Making Xamarin/MonoDevelop Work for You
One of the biggest pain points with using Unity for game development is the absolutely ancient version of MonoDevelop that ships with it. Anyone who writes code for Unity will spend a vast majority of their time in MonoDevelop as opposed to in Unity itself. This post aims to make that time more enjoyable and less angst filled. As of Unity 5 MonoDevelop 4.0.1 is included with the installer. MonoDevelop 4.0.1 was released on March 5th, 2013. Yes, you read that correctly. Over 2 years ago. MonoDevelop is currenctly on version 5.9 which has 2+ years of development time, 2+ years of improvements, 2+ years of bug fixes compared to the Unity fork.
Let’s just get this out of the way now: if you are on Windows you can stop reading here. I apologize on Microsoft’s behalf for the years of terrible Windows releases. I apologize for it being called “windows” but having the worst window management of any modern OS. I apologize for it force restarting your computer twice every month and all of the work lost becauase of it. You can visit the Apple Store page to remedy the situation.
Why Not Visual Studio Code?
The release of Visual Studio Code has got people thinking that anything has to be better than MonoDevelop. In my opinion, Visual Studio Code has a long way to go before it can compete with the latest Xamarin version. It’s worth keeping an eye on as it develops over time but in reality it’s not a great choice for working with Unity at the moment. There are just too many compromises and missing features.
Addressing an Old Unity Bug
Before we go any further there is a Unity bug that we need to discuss. This bug affects the MonoDevelop version that ships with Unity and all newer MonoDevelop/Xamarin versions released after it. Unity injects some cruft into the solution files that it generates that will mess with your code formatting settings in MonoDevelop/Xamarin. Until Unity fixes the bug you can use this script to keep your solution files cleaned up. It will fix the solution files automatically every time Unity regnerates them.
Get the Goods
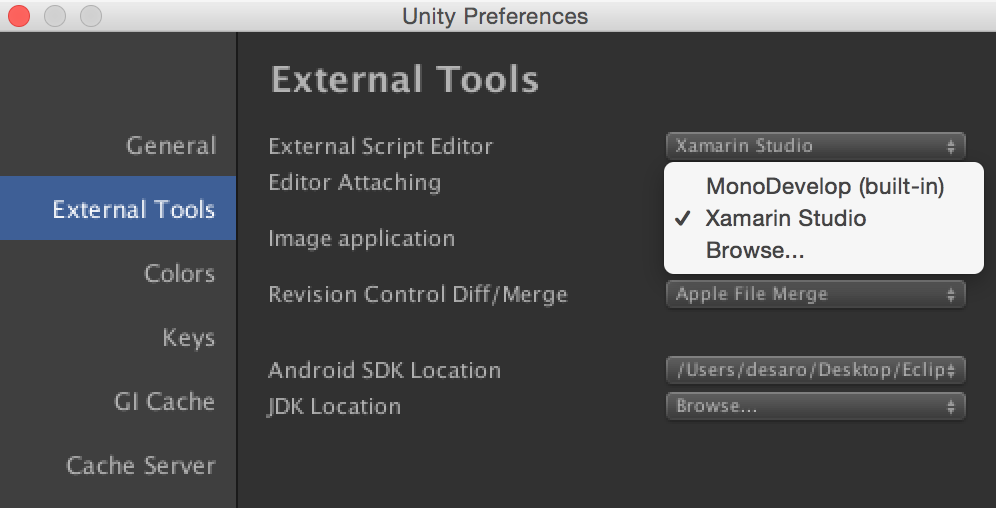
First things first: you need to download the latest version of MonoDevelop (now called Xamarin Studio). You can find it here. Once you install it you need to tell Unity to start using the newly installed Xamarin Studio. You can do that right in the Unity Preferences in the Editor Tools section. Just set it in the External Script Editor setting like so:

The (very minor) Caveats
For now, any time you need to use the debugger you will have to launch the old MonoDevelop included with Unity. In the (hopefully) near future, Unity will be releasing an add-on (basically like a browser extension or plugin) that will work with any Xamarin version. The add-on will provide a full debugger and tight integration with Unity. Until that time you have to “jump start” Xamarin to get it working properly with Unity. Whenever you launch Unity just click the Assets -> Sync MonoDevelop Project menu item. That will launch Xamarin and get it reading your Unity project properly. You only have to do that once at launch and Xamarin will keep an eye on the solution/project files and reload them as necessary when Unity changes them.
Bending Xamarin to Your Will
At this point you can walk away with a working, modern IDE that is light years ahead of what Unity ships with. The rest of this post is going to go into really making Xamarin work for you. Time saving tips and settings that go a long way to making your time editing code more enjoyable.
Themes
Many people enjoy customizing the look of the text editor/IDE they use. I won’t go into this in detail but I will say that Xamarin has some nice themes included that you can find in Preferences -> Text Editor -> Syntax Highlighting. Editing themes and making your own is also quite simple in there. Click around and explore and you should be able to figure everything out without much difficulty.
Understanding Xamarin’s Cascading Settings
Xamarin has several settings duplicated on different levels that cause confusion to folks new to it. At the top level are the global IDE settings which can be found in the normal Preferences panel (Cmd+, or Xamarin Studio -> Preferences menu). These are applied to all new and existing projects. The next settings down are at the solution level. These can be accessed by right-clicking the solution file and choosing “Options”. The final settings cascade is the project level. You can find them by right-clicking any project file and choosing “Options”.
When dealing with settings, the lower cascade overrides anything higher. For example, if you have “Remove trailing whitespace” set to true on the project level and false on the solution level then the true value is what Xamarin will use because it is lower down in the cascade. Remember that Unity bug mentioned above that we fixed with the editor script? Now you have the info to understand it. The bug is that Unity is injecting solution-level settings that affect things like code formatting, tab width, indent margin, etc. Being solution-level, they override all of your global settings!
To avoid confusion I highly recommend only changing settings on the global level until you get used to Xamarin’s settings system or actually have a need for per-solution/project settings. They can be useful in cases where you may be working with different teams on different projects and each team has it’s own set of naming conventions or code formatting. Most people will only need to change the global level settings though and messing with solution/project level settings is risky anyway due to Unity constantly destroying and recreating the solution and project files.
Key Bindings
You can find the key bindings settings here: Preferences -> Environment -> Key Bindings. These are pretty self explanatory so I’ll just leave it at that. Run through and set these up in a way that makes sense for your brain and fingers. Once you do, all your Xamarin projects will then use the same key bindings.
Code Formatting
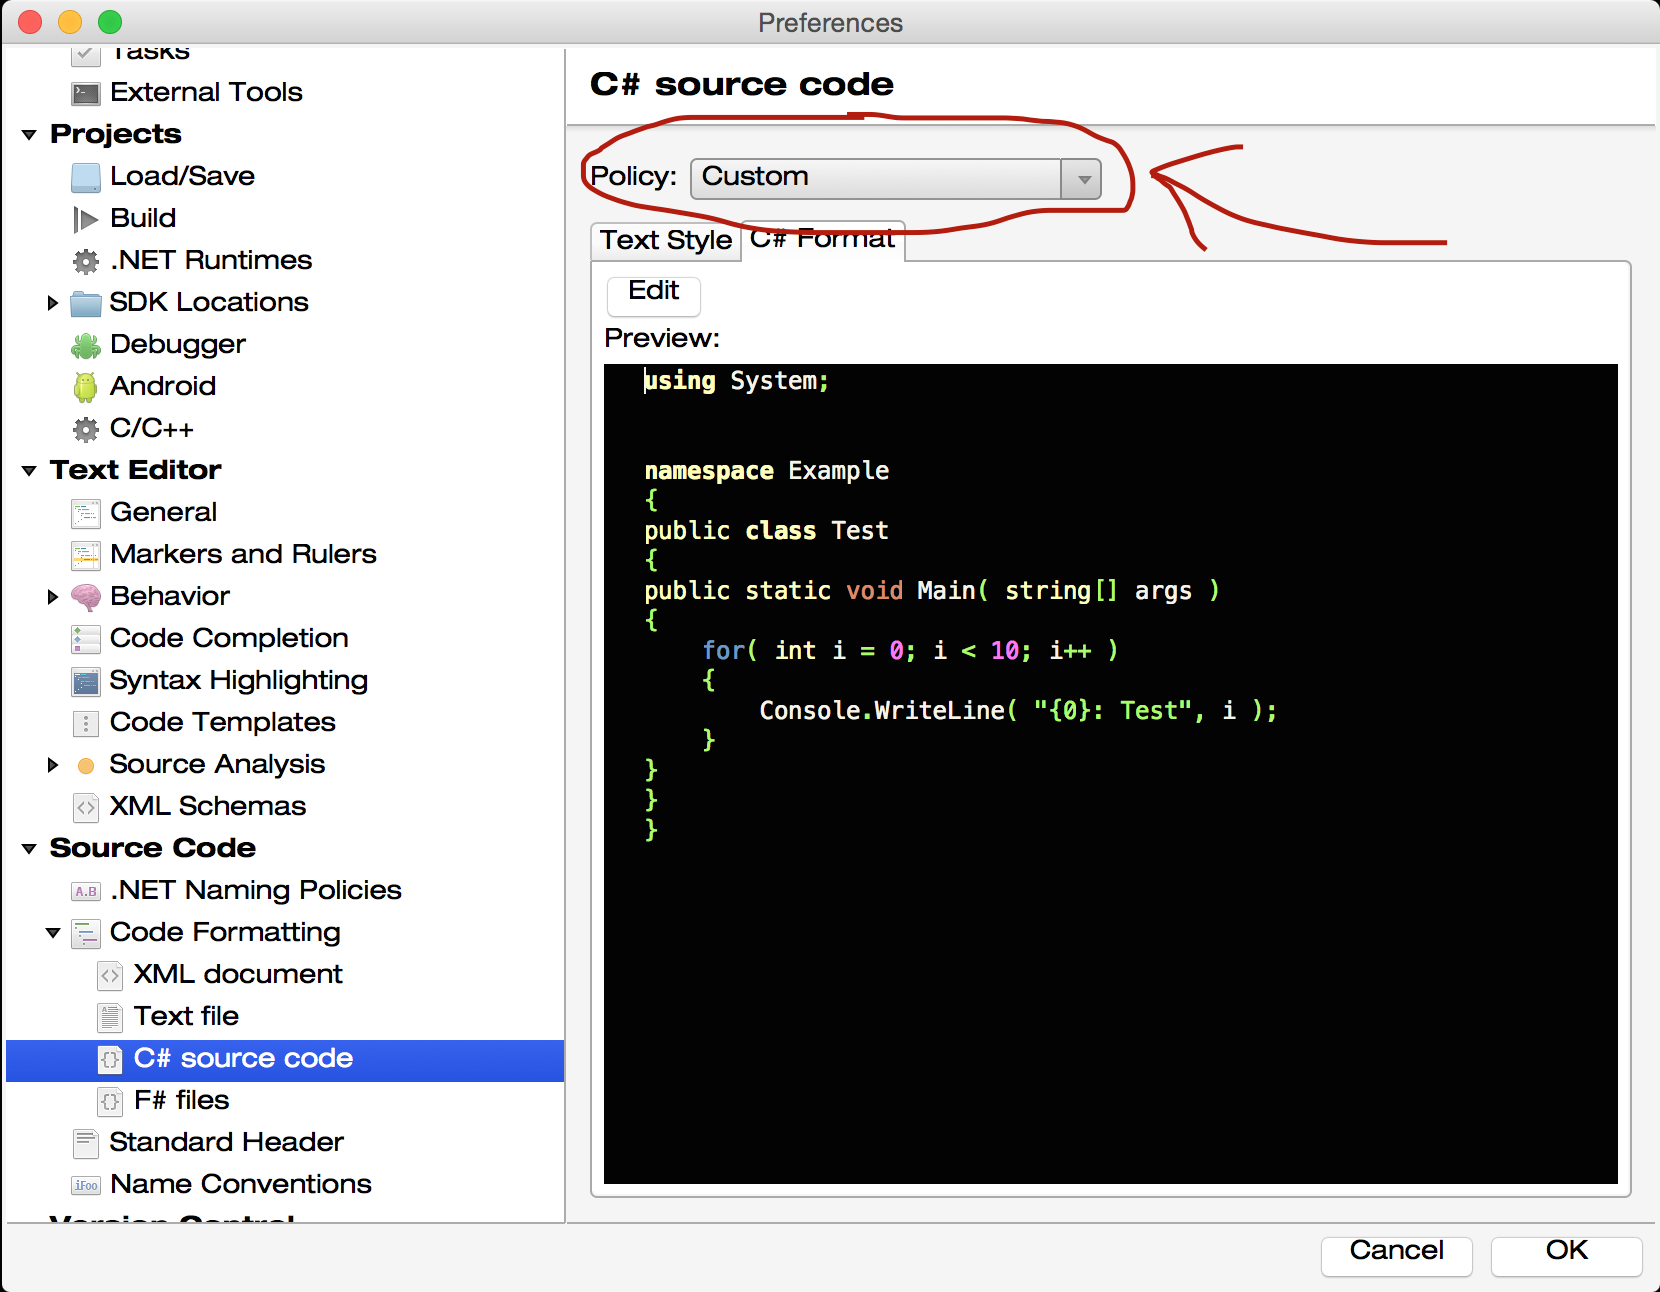
This is one of those things that I highly recommeond setting up. You run through the setup just once and all of your future projects will be formatted exactly the way you like with no extra work on your part. You can find the code formatting options in Preferences -> Source Code -> Code Formatting -> C# source code. If you click on the “C# Format” tab it will show you a little preview of what the formatted code will look like. Chances are it won’t be exactly how you like it. Click the Edit button and run through all the different sections setting things up exactly the way you like. When you are done, you will see that the “Policy” is now set to “Custom”.

Policies are really handy in Xamarin. They are basically a way of saving all your settings in a file so that you can share them or transfer them to other computers keeping your teammates all using the same rules. Let’s go ahead and save a new policy just in case we ever need it. Open the Project -> Export Policy… menu item and in the top box pick a descriptive name for your policy and click the “Export policies” button.
Putting our Policy into Action
Let’s take a quick look at just a couple of the things we can do with Xamarin and our policy. First up, lets let Xamarin implement an interface for us and then we will use the formatting option to format the code exactly how we specified in the previous setion. Note that we could have also had auto formatting turned on and the code formatting would have happened for us. Xamarin can also automatically add using statements, implement abstract methods and lots of other goodies. Just right-click on your code and check the menu on occassion to see what it has.
This next one we will do a safe method rename. When you rename a method like this it changes every single reference to the method in your codebase so it won’t need to be changed anywhere else. After we rename the method “///” (three slashes) are typed above the method which automatically creates an XML comment with all the method parameters that we can fill in. Xamarin will show that information automatically whenever you call the method from another script.
Two Really, Really Handy Shortcuts
Xamarin brings a great productivity boost with it’s many features. I couldn’t end this post without leaving my two most used shortcuts. First up is a full symbol search. (Cmd + .). Just start typing and Xamarin will display all the matching symbols and files with a handy preview when you press the up/down arrows to highlight a result.
Next up is file search. Pressing Cmd + shift + D will again jump focus up to the search box but it prefils the prefix “file:” for you. This limits the search to just file names. Full fuzzy matching is included so for a file called CameraManager for example, you can find it by just typing “CM”.
Conclusion
Taking a few minutes to setup your coding environment will save you tons of time (and frustration) later. Better still, once you take the time to get Xamarin setup the way you like it you never have to go through the setup again. Ditch the terrible version of MonoDevelop that ships with Unity and enjoy an IDE that actually works. As an added benefit, as soon as Unity finishes work on the Xamarin add-on we will have full debugging at some point in the future.