Nez Core
The root class in the Nez world is the Core class which is a subclass of the Game class. Your Game class should subclass Core. Core provides access to all the important subsystems via static fields and methods for easy access.
Graphics#
Nez will create an instance of the Graphics class (available via Graphics.Instance) for you at startup. It includes a default BitmapFont so you can be up and running right away with good looking text (MonoGames SpriteFont has some terrible compression going on) and should cover most of your rendering needs. Graphics provides direct access to a SpriteBatch and there is a SpriteBatch extension class with a bunch of helpers for drawing rectangles, circles, lines, etc.
Scene#
When you set Core.scene to a new Scene, Nez will finish rendering the current Scene, fire off the CoreEvents.SceneChanged event and then start rendering the new Scene. For more information on Scenes see the Scene-Entity-Component FAQ.
Sprites#
You can't make a 2D game without sprites. Nez provides a variety of ways to render sprites from basic single texture rendering to sprite atlas support to nine patch sprites. Some of the common sprite Components to get to know are SpriteRenderer, SpriteAnimator, SpriteTrail, TiledSprite, ScrollingSprite and PrototypeSprite. The two most common things in a 2D game are static sprites and animated sprites. Examples are below:
Sprite Atlases#
Far and away, the most common way to optimize a 2D game is to use sprite atlases. Nez comes with a sprite atlas packer tool and a runtime atlas loader. See this README for more details. Here is a quick usage example. We will be using the folder hierarchy below for the example. Textures can be present in any of the folder. Those in root-dir will not be part of a sprite animation. Any sprites in subfolders will be part of sprite animations with the animation name being the folder name (player, enemy1 and enemy2 would all be valid animations).
- root-dir
- player
- enemy1
- enemy2
To generate the sprite atlas and data file Nez needs to load the atlas use the following command:
mono SpriteAtlasPacker.exe -image:roots.png -map:roots.atlas path/to/root-dir
Copy the generated roots.png and roots.atlas files into your project's Content folder. Note that the .png and .atlas files must have the same name. Now we can load and use the atlas using the following code:
Physics#
Be careful not to confuse the Nez Physics system with realistic physics simulations (such as Box2D, Farseer, Chipmunk, etc)! That is not at all its purpose. The Physics system is here only to provide spatial and collision information. It does not attempt to handle a full, real-world physics simulation. At the core of the Physics system is a SpatialHash that gets populated and updated automatically as you add/remove/move Colliders. You can access the various Physics-related methods via the Physics class which provides methods (boxcast, raycast, etc) to handle broadphase collision detection in a performant way. Internally, Nez uses the Physics systems for collision detection with various shapes such as rectangles, circles and polygons. The Entity class provides move methods that handle all this for you or you could opt to just query the Physics system and handle the narrow phase collision detection yourself.
TimerManager#
The TimerManager is a simple helper that lets you pass in an Action that can be called once or repeately with or without a delay. The Core.Schedule method provides easy access to the TimerManager. When you call Schedule you get back an ITimer object that has a Stop method that can be used to stop the timer from firing again.
CoroutineManager#
The CoroutineManager lets you pass in an IEnumerator which is then ticked each frame allowing you to break long running tasks up into smaller bits. The entry point for starting a coroutine is Core.StartCoroutine which returns an ICoroutine object with a single method: Stop. The execution of a coroutine can be paused at any point using the yield statement. You can yield a call to Coroutine.WaitForSeconds which will delay execution for N seconds or you can yield a call to StartCoroutine to pause until another coroutine completes.
Emitter<CoreEvents>#
Core provides an emitter that fires events at some key times. Access is via Core.Emitter.AddObserver and Core.Emitter.RemoveObserver. The CoreEvents enum defines all the events available.
The Emitter<T> class is available for use in your own classes as well. You can key events by int, enum or any struct. It was really built with int or enum in mind but there is no way to use generics to constrain to just those types. Note that as a performance enhancement if you are using Enums as the event type it is recommended to pass in a custom IEqualityComparer<T> to the Emitter constructor to avoid boxing. See the CoreEventsComparer for a simple template to copy for your own custom IEqualityComparer<T>.
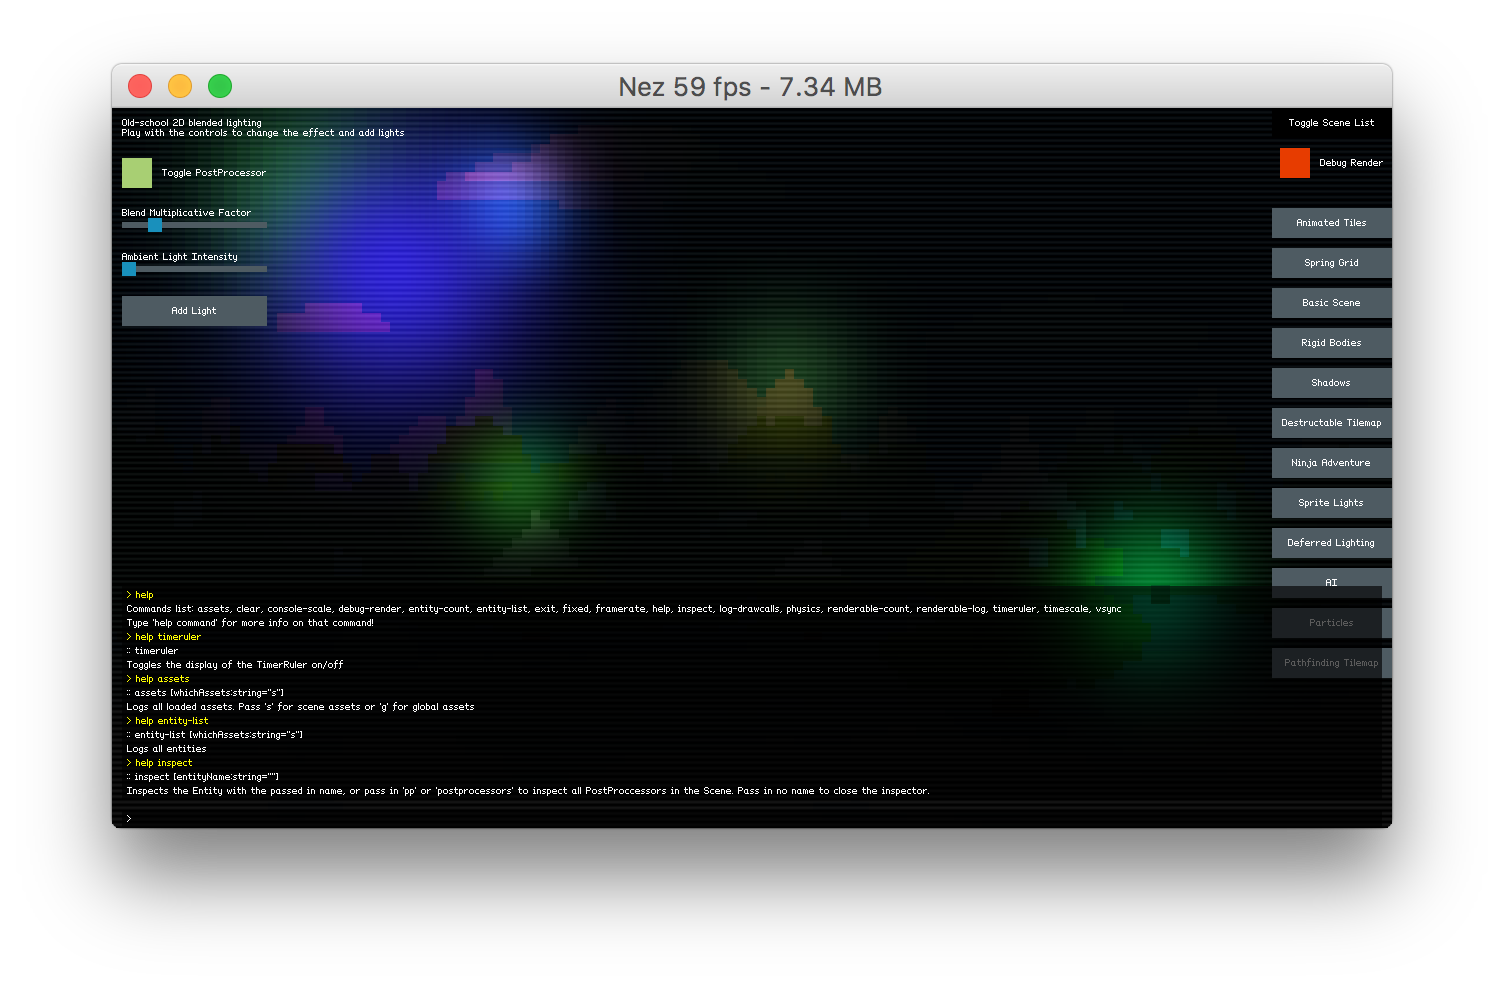
Debug Console#
If you are buliding with the DEBUG compilation symbol, Nez includes a simple console that provides some useful information. Press the tilde (~) key to show/hide the console. Once it is open you can type 'help' to view all the available commands which include helper to log all loaded assets, total entity count, physics colliders managed by the SpatialHash, etc. Type 'help COMMAND' to get help information for a specific command.
You can also easily add your own command to the debug console. Just add the CommandAttribute to any static method and specify the command name and help string. Commands can have a single parameter. Here is an example of one of the built-in commands:
Global Managers#
Nez lets you add a global manager object that will have an update method called every frame before Scene.update occurs. Any of your systems that should persist Scene changes can be put here. Nez has several of it's own systems setup as global managers as well including: scheduler, coroutine manager and tween manager. You can register/unregister your global managers via Core.RegisterGlobalManager and Core.UnregisterGlobalManager.
Other Important Static Classes#
Time#
Time provides easy, static access to deltaTime, unscaledDeltaTime, timeScale and some other useful properties. For ease of use it also provides an altDeltaTime/altTimeScale so that you can have multiple different timelines going on without having to manage them yourself.
Input#
As you can probably guess, Input gets you access to all input (mouse, keyboard, gamepad). All the usual stuff is in there with button terminology defined in the following way:
- Down: true the entire time the button/key is down
- Pressed: true only the frame that a button/key is pressed
- Released: true only the frame that a button/key is released
Several virtual input classes are also provided which let you combine multiple input types into a single class that you can query. For example, you can setup a VirtualButton that can map to a variety of different input types that should result in some object moving to the right. You can create the VirtualButton with the D key, right arrow key, Dpad-right and left GamePad stick and just query it to know if any of those were pressed. The same applies to other common scenarios as well. Virtual input is available for button emulation (VirtualButton), analog joystick emulation (VirtualJoystick) and digital (on/off) joystick emulation (VirtualIntegerAxis). Below is an example of mapping multiple inputs to a single action:
Debug#
The Debug class provides logging and a few drawing methods. The Insist class provides an assortment of assert conditions. These classes are only compiled into DEBUG builds so you can use them freely throughout your code and when you do a non-DEBUG build none of them will be compiled into your game.
Flags#
Do you love the ability to pack lots of data into a single int but hate the syntax of dealing with it? The Flags class is there to help. It includes helper methods for dealing with ints to check if bits are set and to set/unset them. Very handy for dealing with Collider.physicsLayer.